Showing posts with label tutorial. Show all posts

Friday, April 13, 2012

How to Transfer Images from Paper to Fabric Using Oil Paint Sticks (or, "Look Ma, I Invented Carbon Paper!")

"Look Ma, I invented carbon paper!"

When I was a kid, I thought I was unbelievably brilliant when one day I had the idea of coloring with crayons on a piece of paper, then drawing with a pencil on the other side to transfer the crayon to a separate sheet in a detailed shape that could be repeated over and over.  I figured I must be the first person ever to have this idea - you can imagine I was a little crestfallen a few years later when I realized people had been using this technique for many centuries before I ever came up with it.  But, while this idea may not actually be my singular invention, it's still an incredibly useful and versatile technique for artists to incorporate into their work.

I recently had an idea for a version of this "carbon paper" concept in which you have an image on paper, and coat the back of the paper with oil paint stick pigment, which can then be transferred permanently onto fabric.  It works with both light and dark fabrics, and the level of detail that can be achieved is impressive.  Here is a very basic image transfer of light blue and white paint stick onto black fabric:
Dog creature and shark transferred onto fabric
This technique is incredibly easy and fun to do, and does not require expensive supplies or tools.

How to Transfer Images from Paper to Fabric Using Oil Paint Sticks

Materials:
  • Paper (Basic printing paper. You can either draw your image directly or trace over an existing drawing) 
  • Inkjet Printer (optional, for getting an image onto the paper).
  • Oil Paint Sticks.  I use Shiva brand
  • Fabric of a color and texture that works well with the image and colors you have chosen.  Really texture-y fabrics and fabrics with bulky weaves may not work too well for this project. 
  • Light Box (optional but makes it much easier to apply the paint stick to the paper exactly where the design is). 
  • Tape to hold the fabric to your work surface and the drawing in place on the fabric.  You could also iron the fabric to freezer paper for even more stability. 
  • A tool for transferring drawings from paper to fabric.  I like to use a ball point pen because it writes smoothly, you can easily apply enough pressure to get a good transfer, and you can see what you're doing. 
  
** Step 1: Prepare your image on paper **

You could easily just cover a whole sheet of paper with oil paint stick and draw freehand, but if you, like me, are not confident that you will produce drawings you like using this method, it's easy to prepare an image on the computer, size it perfectly and print it onto ordinary 20lb copy paper.
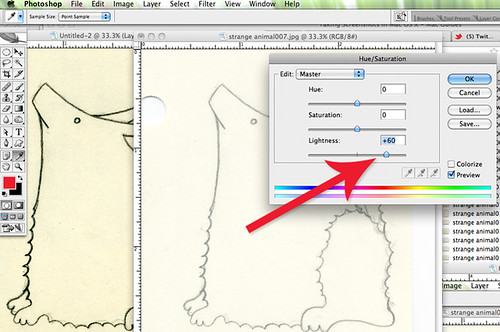
carbon paper1
Prepping the image in Photoshop.
One thing I do when I prepare an image for this technique on my computer is to use Photoshop to lighten the image.  Lightening the image until the lines are gray instead of black makes it super easy to see what you've already drawn when you get to the tracing part.  There are a zillion ways to do this.  I use Photoshop's "Hue/Saturation" adjustment and increase the lightness of the image until I'm satisfied.

** Step 2: Applying Oil Paint Stick to the Paper **

 At this stage, it is helpful if you have access to a light box but not strictly necessary - it just helps you place your paint stick pigment exactly where your design is, but you can solve this problem by covering more of the paper.  If you want to make your own light box for tracing, the internet abounds with instructions for how to whip one of these up from inexpensive materials.
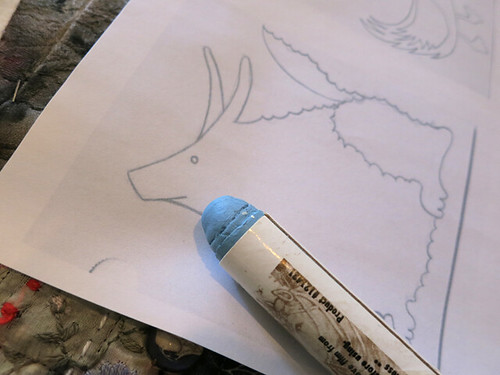
carbon paper2
My printed image with the blue paint stick I've chosen.
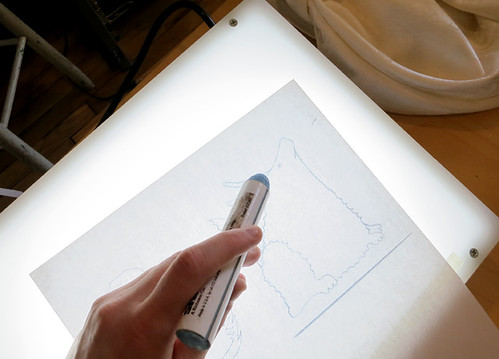
carbon paper3
The image flipped over and placed on the light box, ready for pigment.
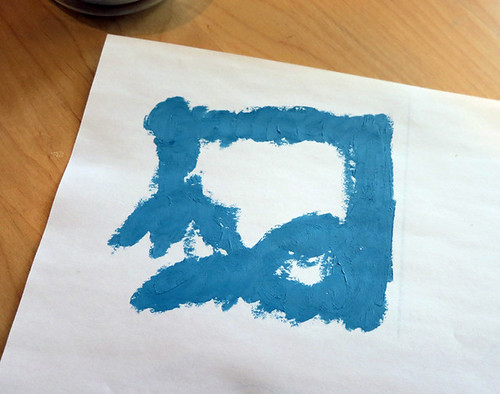
Apply the oil paint by rubbing the stick onto the paper in small circles over the lines of your image.  You want a moderately thick and very even coating of paint, so once you've covered your design, continue rubbing with the paint stick in very gentle circles until you've achieved a smooth coating with no big chunks of paint adhering to it.
carbon paper4
My drawing with paint stick applied evenly.

** Step 3: Tracing Your Drawing **

Once the pigment is on your drawing, it will be very soft and smushy.  This is bad for achieving a clean transfer, so you want to set your drawing aside and wait five to ten minutes for the oil to set up just enough that it doesn't transfer in places where you don't want it.

When you're ready to transfer your image, first tape the fabric onto your work surface, which should be hard and non-padded.  You can also fuse some freezer paper to the back of your fabric to give it even more stability.  Tape the image on top of the fabric.
carbon paper5
Image taped in place on fabric.
Trace the image with your pen, using firm even pressure.  It's fine to stop and start if you need to - it shouldn't affect the quality of the image too much as long as you trace carefully.
carbon paper6
Image being traced with basic ballpoint pen.

When you're done tracing, remove the paper, let the paint stick cure for 24 hours, then heat set according to the package directions.

I like to use up the leftover pigment around the image by transferring random small doodles onto bits of scrap fabric - I can always find a use for these!

Here are other examples of paint stick transfers I've used in my work:
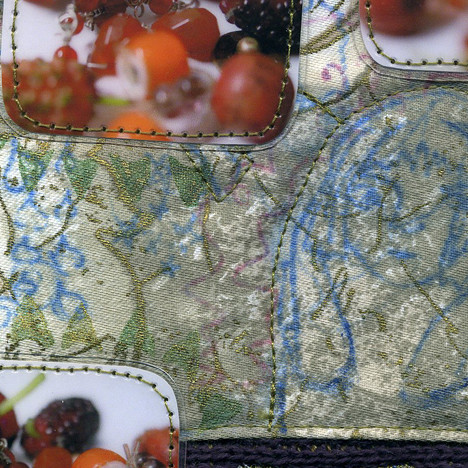
quilt-detail024
Image transfer in blue. This one was actually done using Pentel Fabric Pastels, before I discovered oil paint sticks.  The technique is the same but they don't show up on dark fabrics.
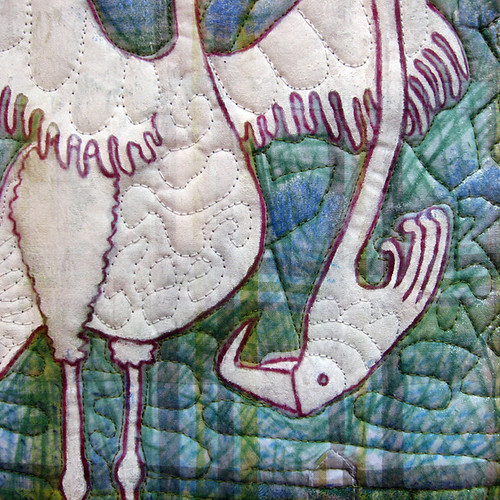
quilt-fictional-animal-white-bird-of-legend3
Paint stick transfer with fabric paint applied inside the image once the paint stick has set.
quilt-5-legged-tambat2
The texture around this drawing was created by randomly scraping the pigment-covered paper with my fingernails. 
This technique is so incredibly simple and versatile that I'm sure you will all come up with amazing projects to try it out!  Have fun!

Monday, March 19, 2012

Available Materials Lab: Coffee Sleeves as Rubbing Plates

The "Available Materials Lab" is the section of my blog all about tips and tricks for making fabulous things using materials you can acquire easily and cheaply, or may even already have in your home.

I noticed a while ago that those paper sleeves you get with a cup of coffee frequently seem to have really interesting textures embossed into the surface, presumably to make them better able to protect your hand from the heat.  Since I have recently been very excited about finding different materials to turn into rubbing plates that can be used with various media on fabric, I thought coffee sleeves might be a perfect example of something that can produce an attractive, generic looking background pattern. 

Materials:
  • Coffee sleeves from wherever you get your coffee - collect however many you need to make a nice sized rubbing plate. 
  • Some sort of substrate to glue the sleeves onto - I used a cardboard mailer I found in the recycle bin. 
  • Basic white glue. Hot glue or a glue stick might work as well if that's what you have on hand.
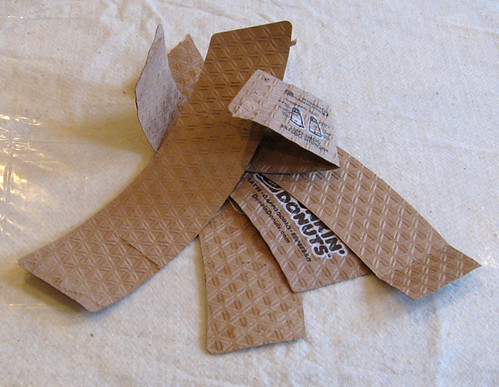
coffee-sleeve1
I have a giant pile of coffee sleeves from Dunkin Donuts lattes.  Fortunately, now that I'm laid off I'm consuming far less of those!
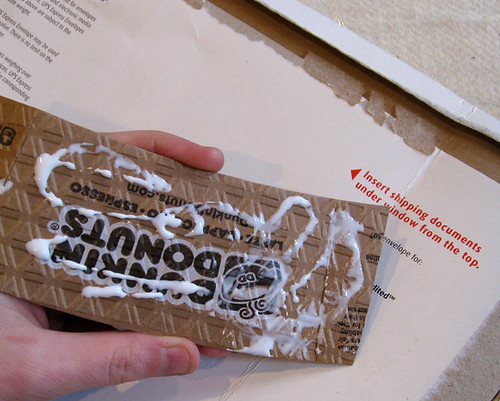
This is a ridiculously easy project!  Just spread some glue on the backs of your coffee sleeves:

coffee-sleeve2


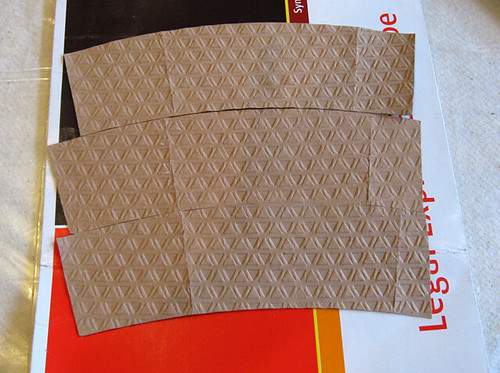
And arrange them together on your backing material.  The pattern will probably not line up perfectly, and you will pick up the line between the sleeves when you do your rubbings, but that's part of what makes these found-object rubbings look so great! 
coffee-sleeve3
If corners start to lift up, slap a big coffee table book on the whole thing.

You'll be surprised how beautiful the rubbings you produce using coffee sleeves can be! 
A small sample rubbing using white oil paint stick on blue silk.
coffee-sleeve5
Gold and maroon paint sticks on fabric that already had a polka dot design - a little busy perhaps?
 

Friday, March 9, 2012

How to Organize Your Sewing Machine Accessories

I recently acquired a new Bernina, and with this machine came an organizational challenge I've never had to face with my little Pfaff Hobby 1030.  With my Pfaff, all the accessories and feet that came with it can fit into the slide-on accessory bin that slides onto the machine and doubles as a sewing surface.  Since I've only acquired one extra foot for that machine, the built in storage has always been perfectly adequate.

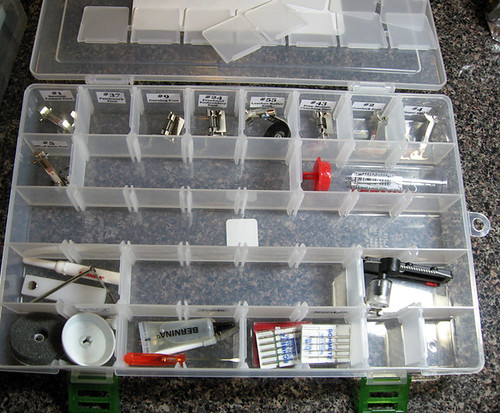
Whole different story with my Bernina 530!  Between the feet it came with, the ones I ordered when I purchased the machine, the various tools, needles and accessories, AND the feet I'm sure I'll keep impulse purchasing as time goes on, there was NO WAY the lame storage box that came with the machine would ever meet my needs.  Below is the box I ended up buying to hold all the stuff, after spending an extremely enjoyable hour and a half at the Container Store, trying to put sewing machine feet into every box in there while chatting with a nice young man who seemed to share my enthusiasm for changeable compartments.

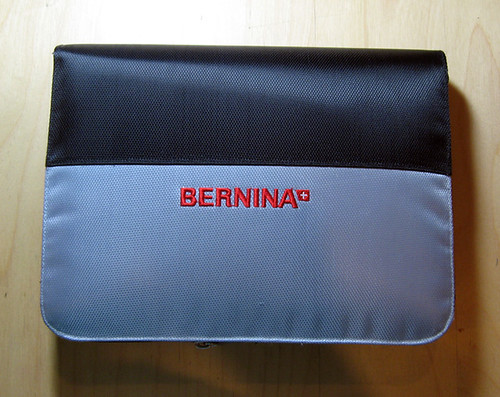
bernina accessory organization1
My exciting new Bernina accessory storage solution
This is the accessory box that came with the machine.  Very attractive, but in the end the thing is not well designed AT ALL!
bernina accessory organization2
Very stylish, too bad it doesn't do its job!
Here are the problems with the Bernina accessory storage box:
  • It does not have enough little compartments to hold nearly the number of feet I'll eventually own! 
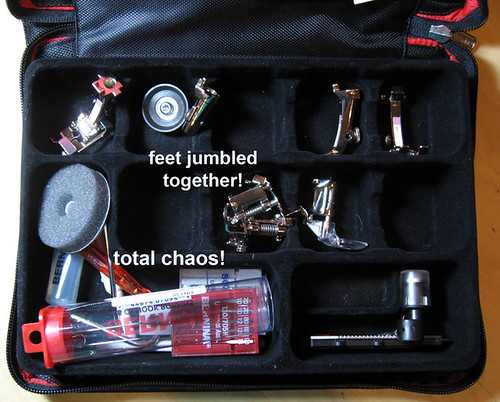
  • When you zip it closed and take it somewhere, the feet and other accessories get all mixed up together because the box is not capable of keeping each item in its place. 
  • The little foot-compartments are nearly all the same size, and one of the feet that came with the machine didn't even have a place it could fit comfortably.  The only foot that has a truly perfect little cubby of its own is the automatic buttonhole foot (as we'll see later in the post, that one actually gave me a bit of a challenge when creating the new system!) 
  • All the non-feet accessories just have to be piled together in one L-shaped compartment and it's annoying to dig through there looking for the one thing you need. 
  • As if all that weren't enough, the accessory box is flocked on the inside, and continually sheds fine black fibers onto everything inside it.  
bernina accessory organization3
The accessory box's interior after being carried around in my bag.
Here's how beautiful everything looks now: 
bernina accessory organization5
A perfectly sized place for everything, plus tons of room to grow!
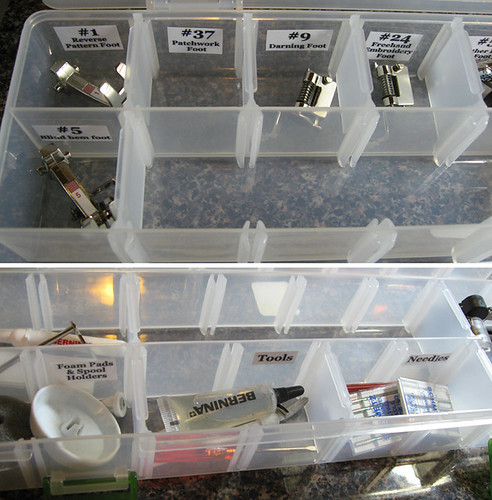
 I wanted each foot to be super easy to spot at a glance, so I printed individual labels from my computer and affixed them with packing tape.  My label maker is away from home at the moment, and plus these labels look extremely cute! 
bernina accessory organization6
Everything neatly labeled and easy to find.
I decided bobbins didn't need to be factored into my container choice, since I already have a perfect way to store them: 
bernina accessory organization7
These rubber doughnut shaped rings are absolutely my favorite bobbin storage solution!
Everything about this plan was falling so perfectly into place, but there did end up being one small challenge.  The automatic buttonhole foot that came my machine, the one that fits so perfectly into the Bernina case, was just not quite able to go all the way into this new box.  Fortunately, the solution to this problem ended up being both fun and dramatic.
bernina accessory organization4
The automatic buttonhole foot does not quite fit into my box, so I'll just have to change the box!
I decided to melt a hole between two rows to make an appropriately shaped spot for the buttonhole foot.  I marked where I would need to cut the plastic with a sharpie, then cut into it using a wood burning tool. 
bernina accessory organization-melty
Melting the plastic with a wood burning tool.
It turns out that melting this kind of plastic with a wood burning tool is extremely easy, but does produce stinky, probably hazardous fumes, so if you do something similar, make sure there's good ventilation. 
bernina accessory organization-melty2
The automatic buttonhole foot in its new home.
My new marvel of organization makes me super happy, and is able to hold almost every foot I might buy, except for bulkier ones like the walking foot or the cutting attachment.  It does take up a bit more space than the old box, but the space is now used so much better!
bernina accessory organization8
Old container and larger new contaniner
Now that I have them all so delightfully organized, stay tuned in the future as I post detailed reviews of some of the more fun and strange Bernina feet I have acquired!

Tuesday, February 28, 2012

How to Use Iron On Transfers as Masks for Painting & Stamping

I always love finding ways to take materials that normally look sort of clunky on a quilt and make them fit in much more smoothly.  A good example of this is iron-on transfer paper, which is great for its quickness and how easy it is to apply, but usually just ends up looking like you've got a big old piece of plastic fused onto the surface of your quilt.  I knew there had to be ways to liven up iron-ons and make them fit into a quilt seamlessly, and so I came up with several cool methods. 

The first technique I'll share is the idea of temporarily leaving the paper backing on the image once you've attached it to the fabric so you can use it as a mask to apply paint or marker around the image.  This technique is fun and easy!

Materials:
  • Inkjet iron-on transfer paper.  For this project, use the transparent kind so the texture or pattern on the fabric will show through your image.  
  • acrylic paints 
  • permanent markers such as Prismacolors.  
  • Light to medium colored fabric that will allow your transferred image to be visible.   
 note: because you cannot apply more heat after fusing the transfers onto the fabric, it is best to use pants and markers which do not have to be heat set, and to reserve this technique for projects that won't have to be washed, like quilts intended as wall art. 
Here's what you do:

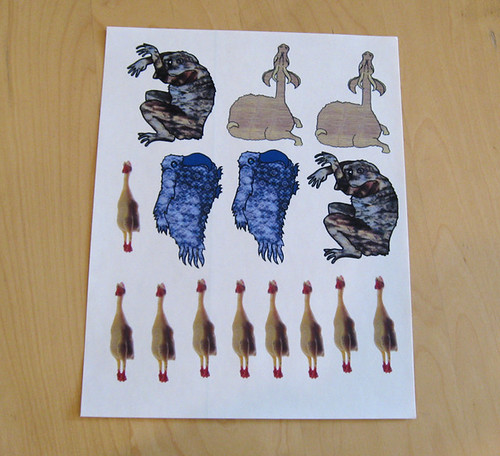
1. Print out a sheet of images on iron-on transfer paper.  Fill up the page as much as you can, and make sure to mirror-image your design before printing if the direction matters.
transfer1
I never have trouble finding images to fill my sheets!

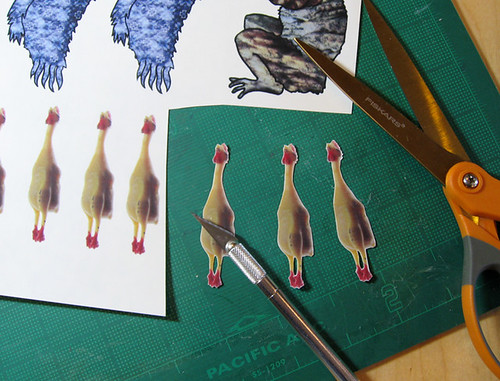
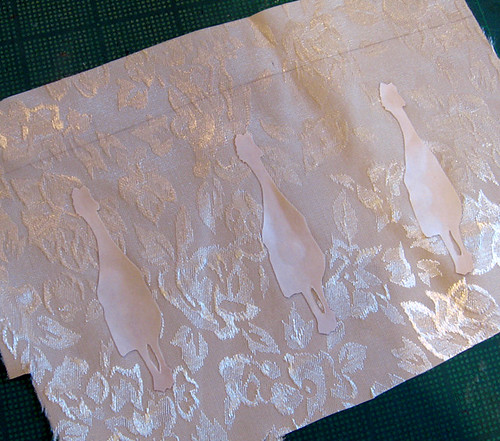
2. Cut out your images with scissors or a craft knife.  The closer you cut to the design the better this technique will work.  Ideally you want no white space around the edges.

transfer2
Three rubber chickens cut as close as possible, ready to be fused to fabric.

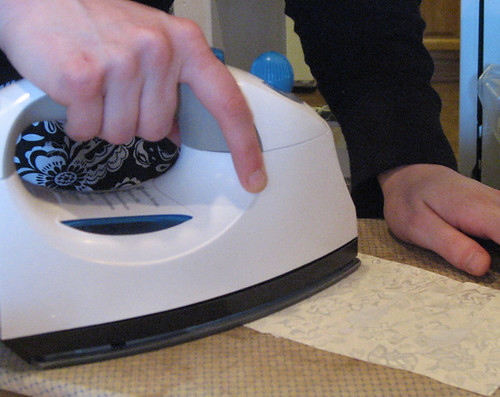
3. Iron your transfer paper onto the fabric according to the directions.  Make sure to leave the paper backing securely attached at this stage.
transfer3
Transferring the images to a white fabric with a pretty design woven into it.
transfer4
A closeup of the chickens waiting to have paint added.

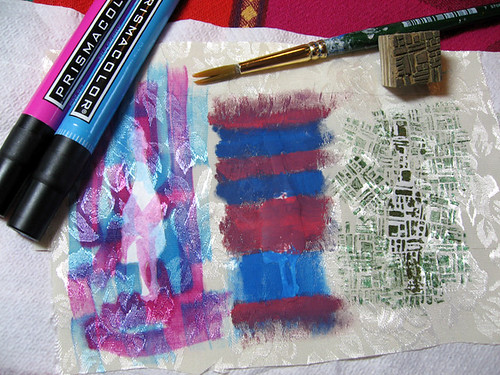
4. Paint, stamp, block print, screen print, airbrush or draw with markers all over and around your images.
transfer5
From left to right: permanent marker, acrylic paint applied with a brush and then with a hand-carved stamp.

5. Allow your paint to dry, then peel off the paper backing.  The image should now stand out nicely against the fabric and at the same time feel more integrated into your project than if you had used iron on transfers by themselves.

The chickens with paint and marker perfectly placed around them.
The colors I used for this tutorial are extremely bold and badly matched, and I picked them because they stand out nicely, but it is very easy to achieve much more subtle and attractive effects.

transfer7
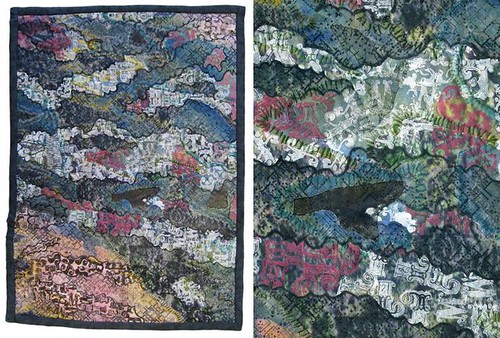
This quilt is the background for my blog. I carefully cut shapes from transfer paper and fused them onto a surface of inkjet printed fabric with embroidery, then applied paint using alphabet stamps to create an intricate texture.
quilt-follow-the-dragon3
A drawing printed onto iron-on transfer paper, with hand-carved stamped images applied around the figure.