
 |
| "The Art of Inclusion #1" |
Title: "The Art of Inclusion #1"
Materials: commercial cottons and sheer fabrics, hand-dyed cotton, inkjet printed cotton, wood, fabric pen, embroidery floss, beads, acrylic paint, polymer clay, laminated images and text, postage stamp, 6B pencil, metal eyelets, piece of a gold-leafed book cover, plastic parts, Shrinky Dinks
Dimensions: 12" by 12"
Date: 2012
This year, as part of my progress towards actually trying to sell my work, I joined the Studio Art Quilt Associates, which, for anyone not familiar with it, is a large professional organization for art quilters. I was thrilled to see that I had joined literally just in time to make a quilt for inclusion in their annual Benefit Auction. The rules for this auction are simple: Make one original 12" square art quilt, and get it to the auction folks by the first of June 2012. I immediately swung into action!
 |
| Detail showing hand embroidery, free motion quilting, Shrinky Dinks (!), and pieces from pinball-style party favor games I had picked up years ago at a dollar store |
For my very first donation to the SAQA auction, I decided to jump in and make the debut quilt in a series I have been thinking about for a while. The quilts in this series will actually all share the title of my blog, because they will hopefully be the best possible expression of my dedication to the Art of Inclusion. The goal is to make a very large series of quilts, sized either 12" or 15" square, that will be created purely to provide homes for the zillions of little details and bits and pieces I am always creating.
 |
| In the bottom left corner, a my drawing of a numbat, inkjet printed onto fabric, plus a laminated postage stamp |
In addition to my main goal of Include-All-The-Things, this series will have two other interesting elements. First, my approach to the design of these quilts will not be based on a landscape or portrait based way of working with my available space, but instead on the concept of filling in the space with existing elements as I go along, and creating small custom pieces to fill in gaps. This is probably the way I work best, and has always produced beautiful results. A great example of the fill-it-in approach is this quilt from 2008.
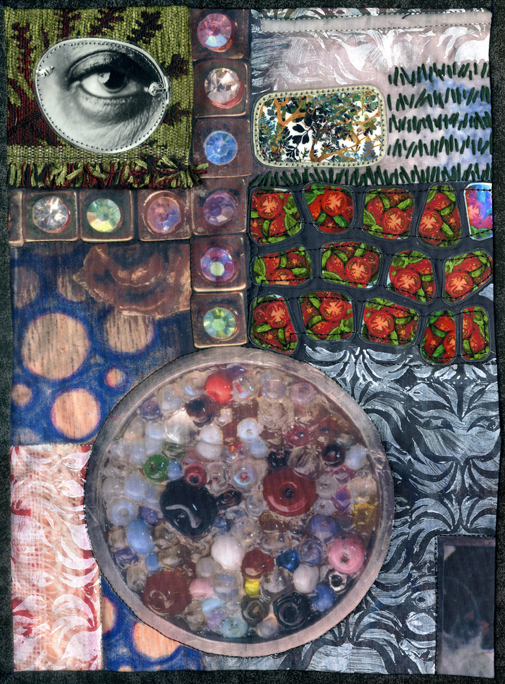 |
| "Filling Spaces: Eye, Tomatoes, Patterns" |
The second idea behind the "Art of Inclusion" series is that these quilts, because they are square, will be able to work either separately or together as "blocks" in a larger wall installation. I have always worked small, and that is not likely to change, but most quilt shows would prefer larger work, and I do like the idea of my quilts being able to command a room.
 |
| A photograph of some kelp from an old science textbook, glued onto plywood and cut out on my scroll saw, plus laminated random lines of text and a monster |
I've included a number of juicy details in this first Art of Inclusion quilt, and many of them have been with me, waiting patiently, for years! There's the painted polymer clay monster mask with the broken ear, the free motion quilting sample of leaves stitched onto a scrap of plaid shirt, the laminated postage stamp, the traced Shrinky Dink leaves from the book of Khmer Ornament, and the drawing of a numbat inkjet printed onto fabric. There's the scan of a marble I found on the street, the chunks of an unfinished cross stitch project my mother donated to my efforts, the random laminated lines of text from long-forgotten books, and the plastic covers from dollar store party favor games that used to be filled with ball bearings and now contain piles of beads.... And that's not even a fraction of my stash!


