For some time now, I have been looking for a method of signing my quilts that is easy, quick to do, attractive, and reflective of my personal style. For a while I was inkjet printing labels on fabric that included my name, the title of the work and the date, but those labels felt unpleasantly sterile-looking and out of place. They definitely did not fit my personal style, and I did not enjoy including the title permanently on each quilt - what if the title needs to change? I thought about simply signing my name with a permanent fabric pen, but that would limit my choices for backing fabric and might be difficult to spot even if I choose pale-ish fabrics every time.
This week, I had a sudden brilliant idea: I should sign by hand on paper and add the year, then laminate the signature and attach it to the quilt with stitching. It's quick, easy, looks beautiful and is exactly the sort of thing I
would do - my laminator is basically a second boyfriend! - I just can't believe it took me this long to get there.
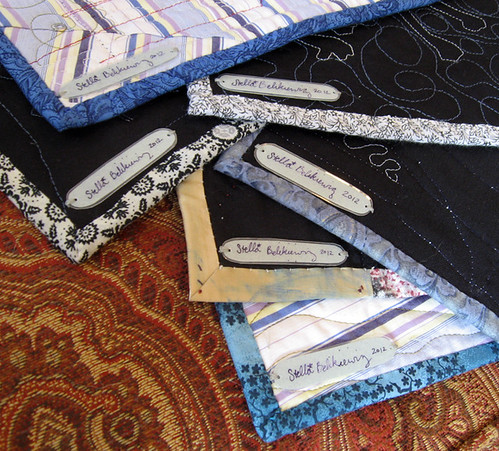 |
| Quilts with signatures attached |
Here is how to create a laminated signature for an art quilt
Materials:
- Colored papers (these should be paper-weight instead of card-weight because they will laminate more successfully if they are thinner).
- Something to sign your name with (I used dip-pens and bottles of ink for this round, but you could use Anything you like, really - pencils, ballpoint pens, colored pencils, even crayons!)
- 10-mil laminate & a laminator.
- A 1/16" hole punch (seriously, if you don't have one of these, get one. You would not believe how much I use mine!)
- A glue stick.
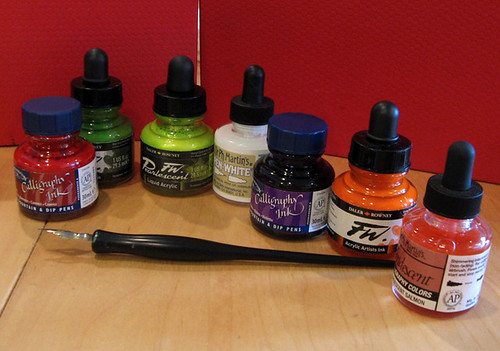 |
| Bottles of ink & dip-pen with nib |
Pick your writing tools and start signing. You should make plenty of signatures so that you can weed out the ones that look crappy. With a last name like Belikiewicz, I fall prey to ugly signature syndrome more and more as I age and my handwriting gets worse.
 |
| Many signatures in different colors on different papers. |
Make sure to leave enough room between signatures that they can be cut out individually. After you've signed your name until your hand starts cramping, go through and select the most attractive ones. I cut mine out so that they have rounded ends. This is extremely time-consuming but I think the rounded ends look considerably better on the back of a quilt and are also less likely to catch on something when being stored or moved around.
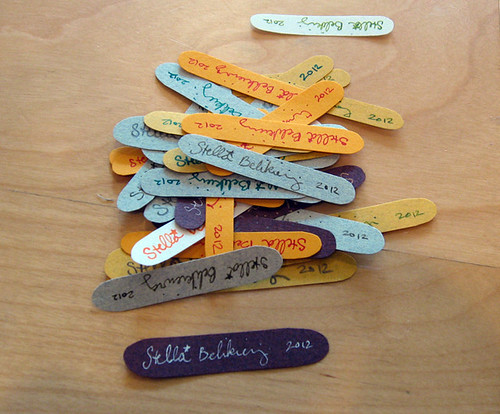 |
| Signatures ready to be laminated. I guess I have to make A LOT of quilts this year just to use these things up! |
Laminate pouches have problems with static, and tiny paper bits are prone to moving around and getting all overlapped and not useable. A tiny dab of glue on the back of the paper solves this problem completely.
 |
| The tiniest amount of glue will hold your paper in place until you can run it through the laminator. |
Use small laminate pouches. Trying to laminate small items in larger pouches will result in air bubbles being trapped around the edges of your paper, which is unattractive and weakens the bond between laminate and paper. I used business-card sized pouches for this demonstration.
 |
| Signatures staying in place nicely. |
Use your 1/16" hole punch to make a hole at either end of the paper. It works far better if you punch holes before cutting out small items.
 |
| Punch holes before cutting out signatures. |
Cut out signatures as close to the paper edge as you think looks attractive. It takes a bit of time to create a pile of signatures, but now you have them ready and waiting to attach to your quilts as you finish them.
 |
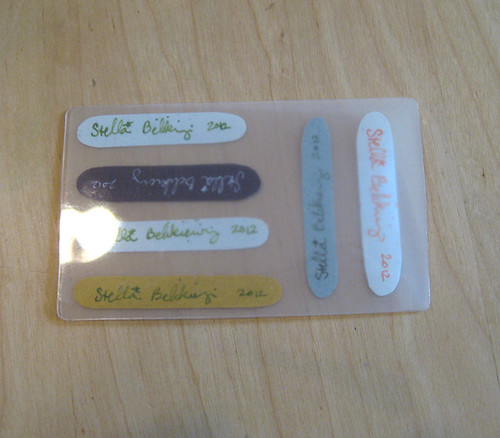
| Finished! Now to make many, many quilts! |

I love these so much. Such a nifty way to sign these. And, really, useful for a lot of different arts and crafts.
ReplyDeleteIt does presuppose ownership of a laminator, but I feel that should just be a given for any serious crafter!
DeleteRight now it appears like Movable Type is the best blogging platform out
ReplyDeletethere right now. (from what I've read) Is that what you are using on your blog?
Also see my web site > marley electric baseboard heaters