
When I was a kid, I thought I was unbelievably brilliant when one day I had the idea of coloring with crayons on a piece of paper, then drawing with a pencil on the other side to transfer the crayon to a separate sheet in a detailed shape that could be repeated over and over. I figured I must be the first person ever to have this idea - you can imagine I was a little crestfallen a few years later when I realized people had been using this technique for many centuries before I ever came up with it. But, while this idea may not actually be my singular invention, it's still an incredibly useful and versatile technique for artists to incorporate into their work.
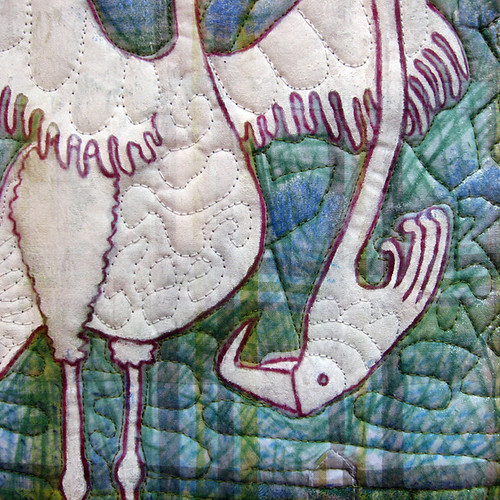
I recently had an idea for a version of this "carbon paper" concept in which you have an image on paper, and coat the back of the paper with oil paint stick pigment, which can then be transferred permanently onto fabric. It works with both light and dark fabrics, and the level of detail that can be achieved is impressive. Here is a very basic image transfer of light blue and white paint stick onto black fabric:
 |
| Dog creature and shark transferred onto fabric |
How to Transfer Images from Paper to Fabric Using Oil Paint Sticks
Materials:
- Paper (Basic printing paper. You can either draw your image directly or trace over an existing drawing)
- Inkjet Printer (optional, for getting an image onto the paper).
- Oil Paint Sticks. I use Shiva brand.
- Fabric of a color and texture that works well with the image and colors you have chosen. Really texture-y fabrics and fabrics with bulky weaves may not work too well for this project.
- Light Box (optional but makes it much easier to apply the paint stick to the paper exactly where the design is).
- Tape to hold the fabric to your work surface and the drawing in place on the fabric. You could also iron the fabric to freezer paper for even more stability.
- A tool for transferring drawings from paper to fabric. I like to use a ball point pen because it writes smoothly, you can easily apply enough pressure to get a good transfer, and you can see what you're doing.
** Step 1: Prepare your image on paper **
You could easily just cover a whole sheet of paper with oil paint stick and draw freehand, but if you, like me, are not confident that you will produce drawings you like using this method, it's easy to prepare an image on the computer, size it perfectly and print it onto ordinary 20lb copy paper.
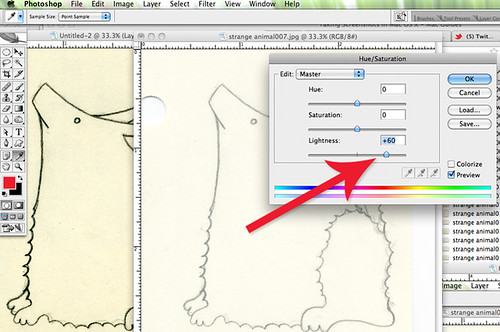 |
| Prepping the image in Photoshop. |
** Step 2: Applying Oil Paint Stick to the Paper **
At this stage, it is helpful if you have access to a light box but not strictly necessary - it just helps you place your paint stick pigment exactly where your design is, but you can solve this problem by covering more of the paper. If you want to make your own light box for tracing, the internet abounds with instructions for how to whip one of these up from inexpensive materials.
 |
| My printed image with the blue paint stick I've chosen. |
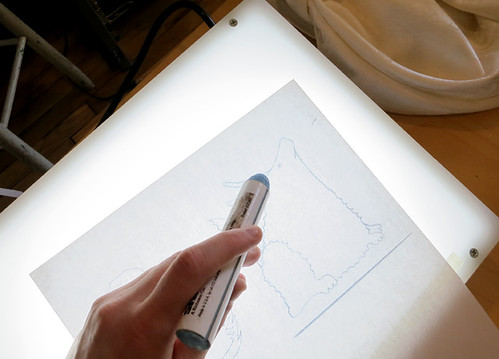 |
| The image flipped over and placed on the light box, ready for pigment. |
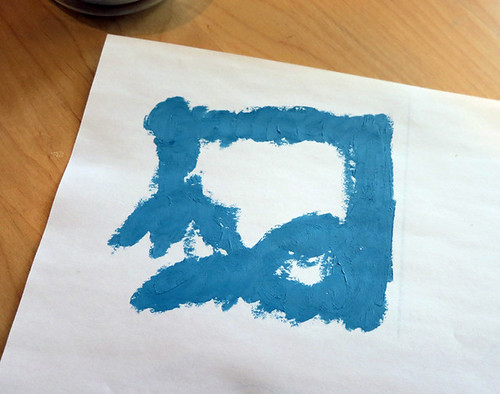 |
| My drawing with paint stick applied evenly. |
** Step 3: Tracing Your Drawing **
Once the pigment is on your drawing, it will be very soft and smushy. This is bad for achieving a clean transfer, so you want to set your drawing aside and wait five to ten minutes for the oil to set up just enough that it doesn't transfer in places where you don't want it.
When you're ready to transfer your image, first tape the fabric onto your work surface, which should be hard and non-padded. You can also fuse some freezer paper to the back of your fabric to give it even more stability. Tape the image on top of the fabric.
 |
| Image taped in place on fabric. |
 |
| Image being traced with basic ballpoint pen. |
When you're done tracing, remove the paper, let the paint stick cure for 24 hours, then heat set according to the package directions.
I like to use up the leftover pigment around the image by transferring random small doodles onto bits of scrap fabric - I can always find a use for these!
Here are other examples of paint stick transfers I've used in my work:
 |
| Image transfer in blue. This one was actually done using Pentel Fabric Pastels, before I discovered oil paint sticks. The technique is the same but they don't show up on dark fabrics. |
 |
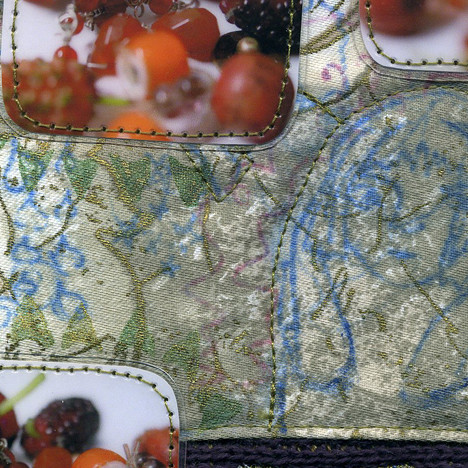
| Paint stick transfer with fabric paint applied inside the image once the paint stick has set. |
 |
| The texture around this drawing was created by randomly scraping the pigment-covered paper with my fingernails. |
It looks so easy! yet so cool. Especially on imaginary bird.
ReplyDeleteThis is a really cool technique! I'm keeping those oil sticks in mind for my next visit to the art store.
ReplyDeleteAs far as I can tell, they really are the most magical tool for mark-making on fabric! They're a bit expensive, but completely worth it for the freedom they give you.
DeleteThis is a really fun way to use paintstiks that I'm sure I'll try soon. Thanks for the excellent tutorial!
ReplyDeleteI'm not sure if it's possible to post images in blog comments, but if it is, I'd love to see what you do! Oh, you could also post a link!
DeleteThanks for following my blog! I'll make sure to blog about it when I've tried this technique, and link back to your page. Have great week!
Deletethis is fabulous!
ReplyDeleteThank you so much! The header image on your blog is gorgeous, and I'll definitely add it to the quilting blogs I follow - that freezer paper stenciled organza Kindle cover rocks my socks off!
DeleteThanks- I liked it when I saw it too but I can't take credit for the blog header- it came as part of the theme I chose for my blog! The kindle cover was fun to do.
Delete